


Archive: April, 2017
Right Angles are Our Friends
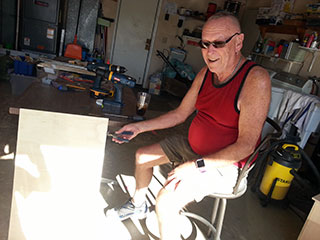
Thanks for doing this with me, Dad!
You might recall I posted some months ago about my comic-book collection and its steadily oozing expansion that threatens to consume a whole room in my home. As discussed then, I found some videos on the Interwebs from people that have built themselves some customized storage units and set out on a similar undertaking.
I drew up some "plans," which is a generous term; they were adequate, but not especially organized. I sought out the materials I would need. Then I left it alone for a while while other things came and went.
But last month I drove down to see my dad in Palm Springs, Home Depot gift cards in hand, thinking it would be fun to do this project with him and a good excuse to visit for a couple weeks. Which it was. Dad and I built four cabinets with three drawers each to house roughly 2,500-3,000 comics in total.
It was a learning experience as well as a good time; I've done a fair amount of tinkering and improvising things in my day, but never a start-from-scratch building project like this. We made some mistakes.

The workstation
First off, we bought wood that did not match my plans' specifications — I planned for half-inch thick boards, but I got wood planks that were slightly less than half an inch thick and did not make any corresponding adjustment to my specs. Thus, we made drawers that were ever-so-slightly narrower than spec and drawer housings that were not uniformly wide. So a number of them had to be "MacGyvered" to work properly by shimming the rails with whatever was handy (metal washers, wood scraps, cardboard).
![]()
Almost half an inch isn't actually half an inch. Multiplied enough and you need a quarter-inch of shim.
More annoyingly, I didn't think through a proper way to attach the front panels of the drawers. They were intended to overlay and extend beyond the face of the drawers by a half-inch on all sides, but every attempt to attach them was off-center and/or crooked. In order to get them all to fit, we ended up trimming a number of them rather than continue to try over and over to reposition them properly.
Also, though we had a fantastic table saw for the smaller pieces, we didn't have a good way to cut down the larger ones. We improvised something that seemed to work adequately, but then in the process of assembly realized that many of the pieces we cut were not cut straight; the bottom edge would end up being shorter than the top edge, that sort of thing. Not by a lot, and in and of themselves, the pieces worked fine, but in the overall assembly, there were enough weird angles and slight slants to things to cause frustrations and some funky weirdness to the finished product.
In the end, they are completely functional and, I think, more than adequately appealing. But as my dad said while trimming one of the crooked drawer fronts to make it fit alongside the two others in the unit, "at least when anyone looks closely at these they'll know they were home-made."
I'll eventually paint or stain them, but that's something for another day; I don't plan on staying in my current abode all that much longer, so that'll wait until I know what my new place will look like. Plus, I still have a ton of overflow; I'll want to build more of these then, too. With more attention to measurements and right angles.


Of course, now I have an elegant solution for how to position the front panels to attach them properly.
Maybe I'll find it worth the hassle to remove and reattach them later.

The sides of this drawer are cut at a not-quite-right angle, making the front attach with a bit of a warp.

Far, far better than the endless sprawl of cardboard boxes I was previously dealing with, but even when thinned out—the cardboard boxes on top plus a couple out of frame are slated for eBay—I still have 2½ cardboard longboxes and 4 shortboxes (center) full of comics and I can't seem to keep from buying more every month. More building to come!
Tagged
Comics,
Dad,
Projects |
Posted on April 26, 2017 at 10:32pm | Permalink |  |
| 